|
To follow this tutorial you will only need a basic knowledge of MAX and also to download some map files (textures). The bigger and more detailed the maps you get the better the final result will look. Thanks to Mike Marable for testing this for me  and GOOD LUCK! and GOOD LUCK!
|
||||
| Please CLICK on a thumbnail to get a bigger version. | ||||
|
|
||||
|
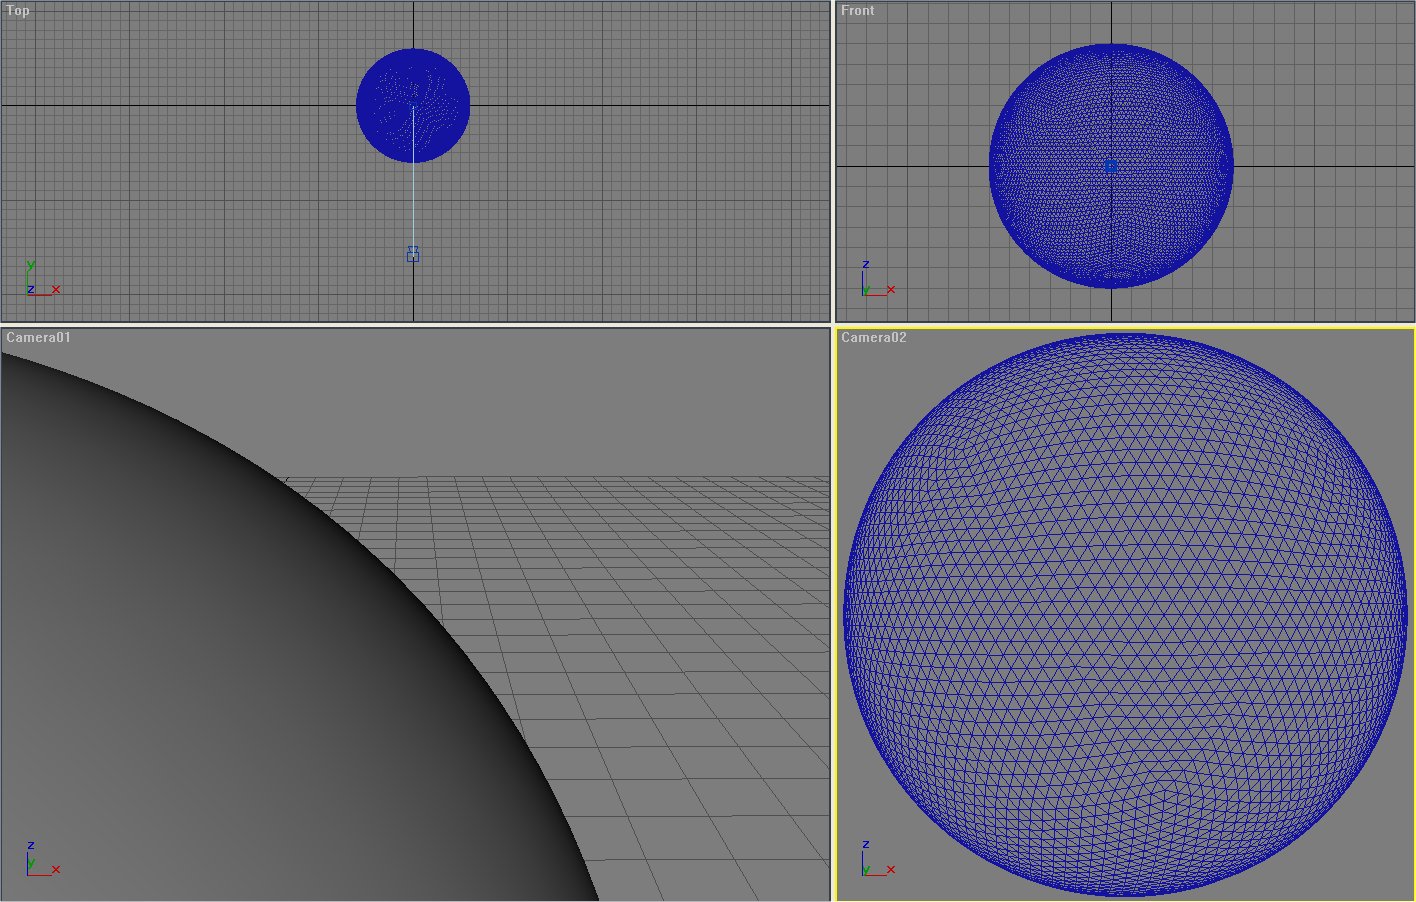
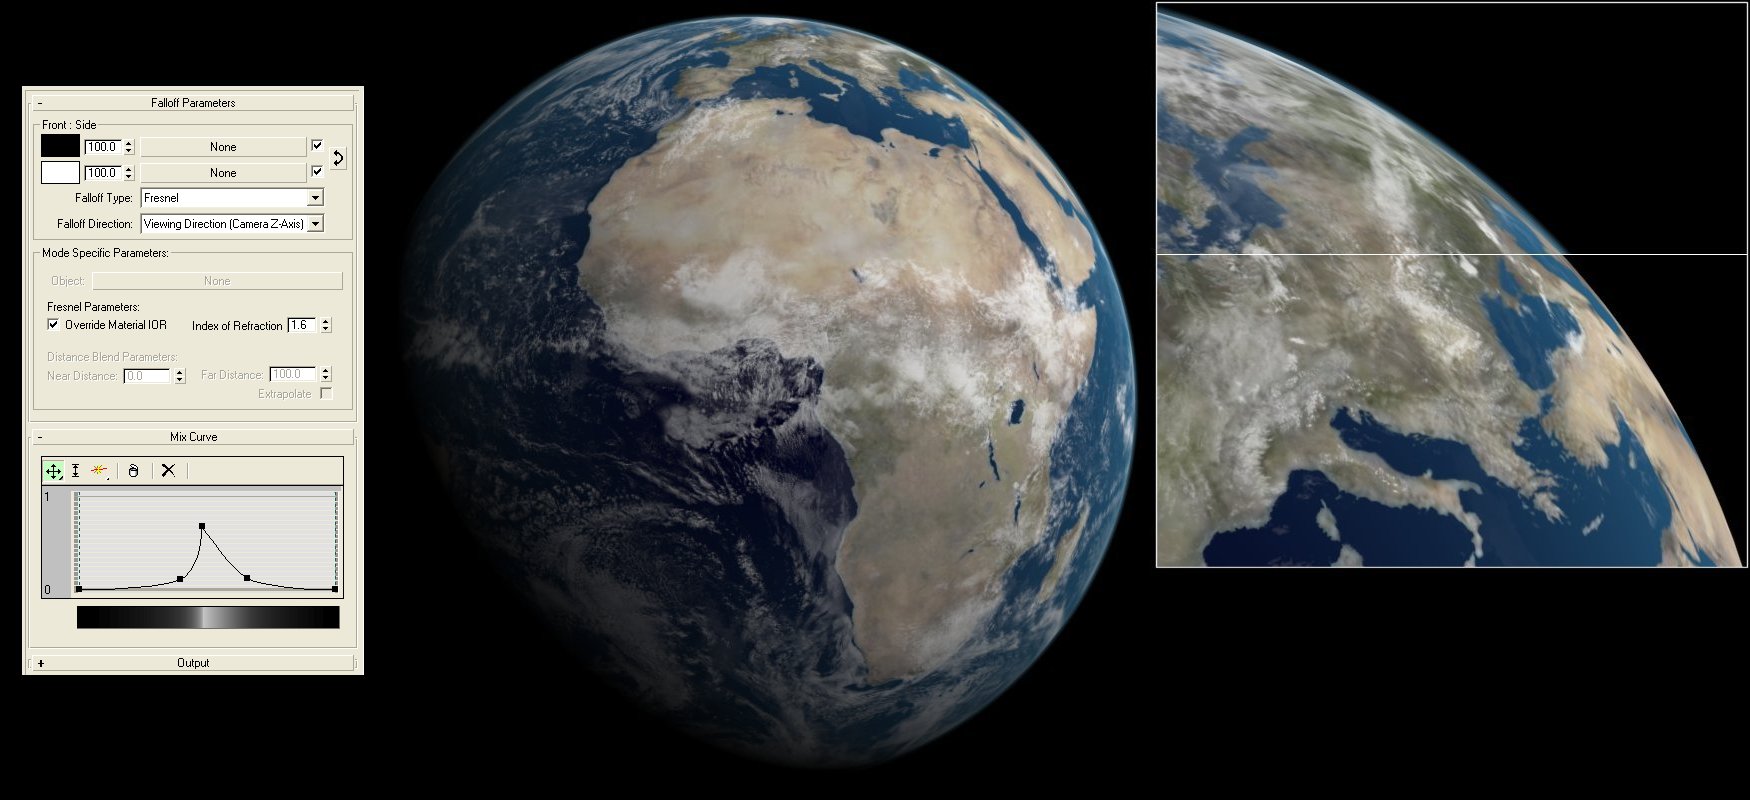
The first thing we need to do is to create the object that will be the planet. I used a GeoSphere Object as this seems to look sharper for the same polygons than the normal Sphere. First I suggest that you change the "System Unit Scale" to "Kilometres". To do this go to "Customize" then "Preference" then the "General" tab and change the "System Unit Scale" to '1 Unit = 1.0 Kilometers'. Now that we have our scale lets make a GeoSphere with a radius of '6000' Kilometres. I suggest you call it something useful like 'Earth Surface' as there will be other parts needed to make up our earth. | |||
| Now we need to make it start to look like a planet. So find your self a nice earth map I got the map I used for this tutorial from http://visibleearth.nasa.gov/view_rec.php?id=2430 it is the 10k colour map. So apply it to the "Diffuse Color" slot of a texture and add it to our earth and re-render. The End… OK maybe not. |

|
|||
|
The problem with this map is that it is the earth without an atmosphere so to make it look correct we need to add one. The easiest way to do this is to open your favourite paint package and start to mess about… I use Paint Shop Pro but you should be able to do this on any of the other good ones. First load the map file into the program, now change the "Saturation" to -20 and reduce the "Brightness" by 25. If you have not got a super computer that may take quite a few minutes as the image is quite big. Now save it again under a different name and apply that one to the earth. It's looking a bit better now. | |||
CLOUDS… We need some clouds. So create a sphere slightly bigger than the surface of the planet and name it 'Clouds'. I made mine 10km bigger so that's 6010km in radius. I did not get the cloud map I used for this from the same site as the other maps or though I have just been onto that site again and they do have a new link to a tutorial of how to create an UP-TO-DATE MAP! Instead I got mine from http://visibleearth.nasa.gov/view_rec.php?id=2432. Now apply it to the opacity of an empty texture, change the diffuse colour to white and apply that texture to the new sphere named "Clouds". The "Opacity" works by making everything that is black transparent, everything white opaque and makes everything in-between… well in-between!  LOOKING GOOD! LOOKING GOOD!
|
|
|||
|
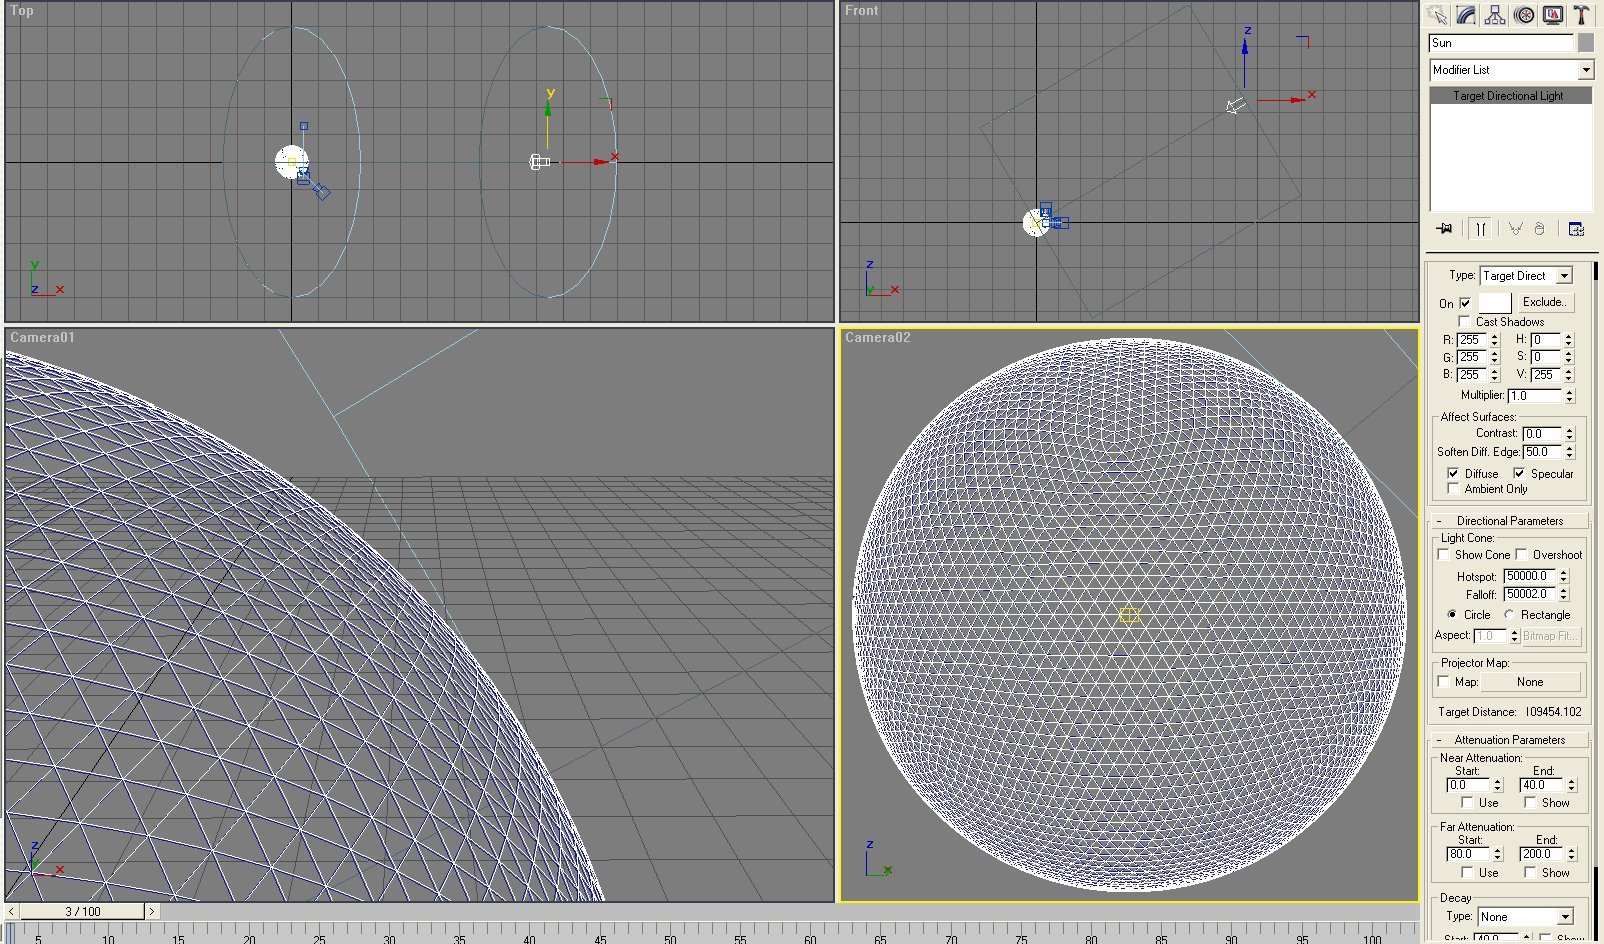
Now let's look at the ocean. I don't believe that using a map for the oceans looks as good as it could. This is because the oceans are translucent and reflective. To create a good looking ocean we need to create a dynamic texture. But first we need a better light source that the default one. So from the "Lights & Cameras" section choose "Target Directional Light" (Our Sun is SO far away that by the time the light rays reaches us they are particle parallel and this light source recreates this light.). Now place the light next to the planet and make it point towards it. Change the "Hotspot" that is in the "Directional Parameters" - "Light Cone" to 50000. If you want to make the sun brighter and go to dark on the other side of the planet smother increase the "Affect Surfaces" "Contrast" to about '25' and the "Soften Diff. Edge" to '100'. | |||
|
What we need is to create a texture that is a darkish blue on the centre of the sphere going to a lighter blue towards the outside. So find another empty texture slot and change the "Diffuse" slot to a Falloff texture. Now go into the options for the falloff and change the first (top) colour to Red: 0, Green: 0, Blue: 20 and the second colour to Red: 20, Green: 70 and Blue: 100. Next make sure that the "Falloff Type" is "Perpendicular / Parallel". Now drop that texture onto the "Earth Surface" object and re-render… A WATER WORLD!!!
|

|
|||

|
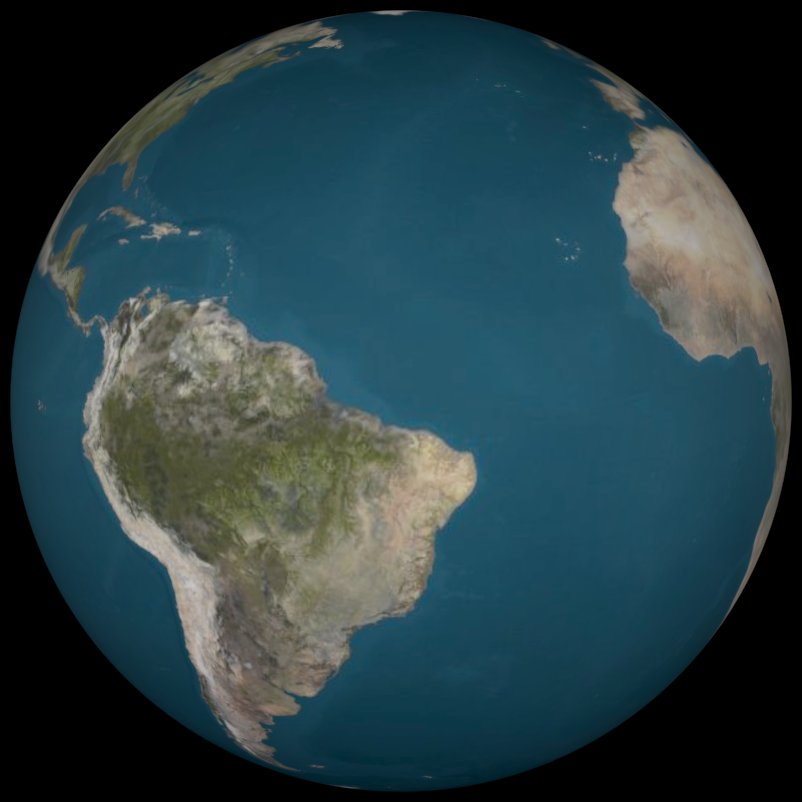
Let's merge the land and ocean. Get another blank texture and change the type from "Standard" to "Blend". Now copy the land texture into "Material 1" slot and the ocean texture into the other one. Finally get the 10k "specular map" from the same web page as the rest of the maps we have used and put it into the "Mask" slot. Now drop this new texture onto the planet and re-render. Now it looks like the earth… | |||
|
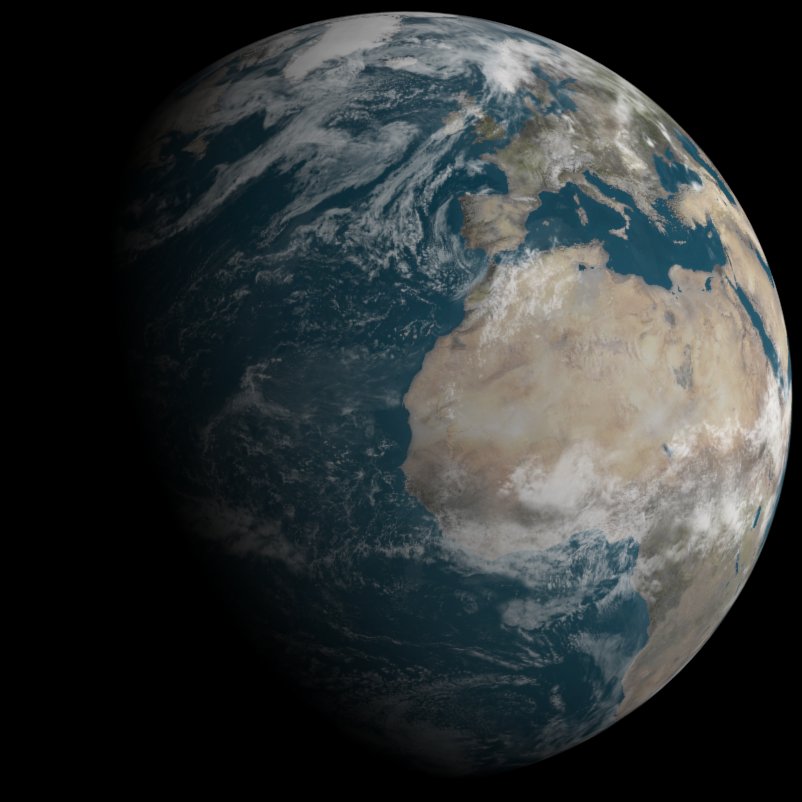
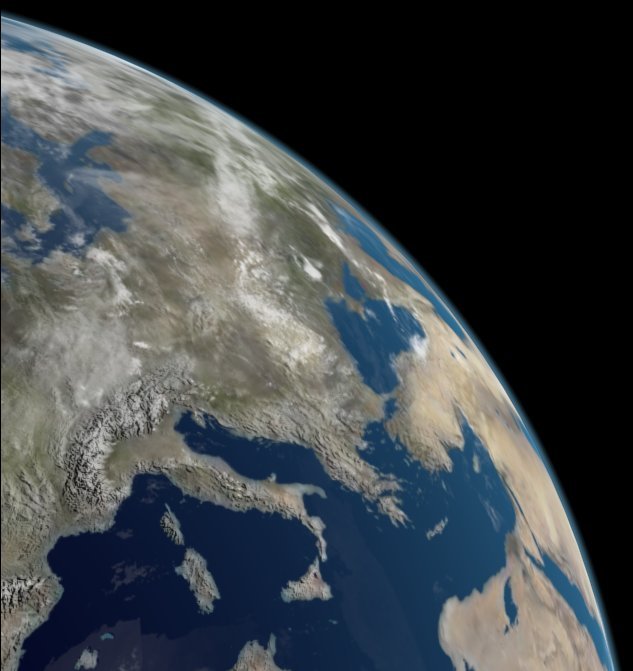
But to make it look even BETTER lets add an atmosphere glow. It should ONLY glow at the edges of the planet where the light is coming at an angle and bouncing back off into the camera / eye. So first create a new sphere bigger than the cloud sphere by about 40 which gives us a radius of 6060km. What we are after is not strictly a 'glow' as that can be achieved easily but looks cr@p... What we want is a bluish err… FINE A GLOW! But not like MAX's normal one. Again we will use a falloff for this but this time it will be a bit more complex. Change the new texture's "Diffuse" colour to Red: 50, Green: 110 & Blue: 145 then put a falloff map into the "Opacity" slot and in the options for the falloff… err make it look like this picture!
|
|
|||
|
Then drop it onto the new "Atmosphere" sphere and yes re-render… As you can see that took away the sharp edges but didn't make it look too unrealistic. BUT this is just what I liked if you want it to look brighter or maybe start later then mess around until you get what you want as it took me ages to get this like I liked it. Now that looks like the earth lets make it look a bit nicer first off let's make it even more 3D by adding mountains etc… Download the 10k "bump map" and drop it into the "Earth Surface" "Bump" slot and re-render. LOOK A HILL! | |||
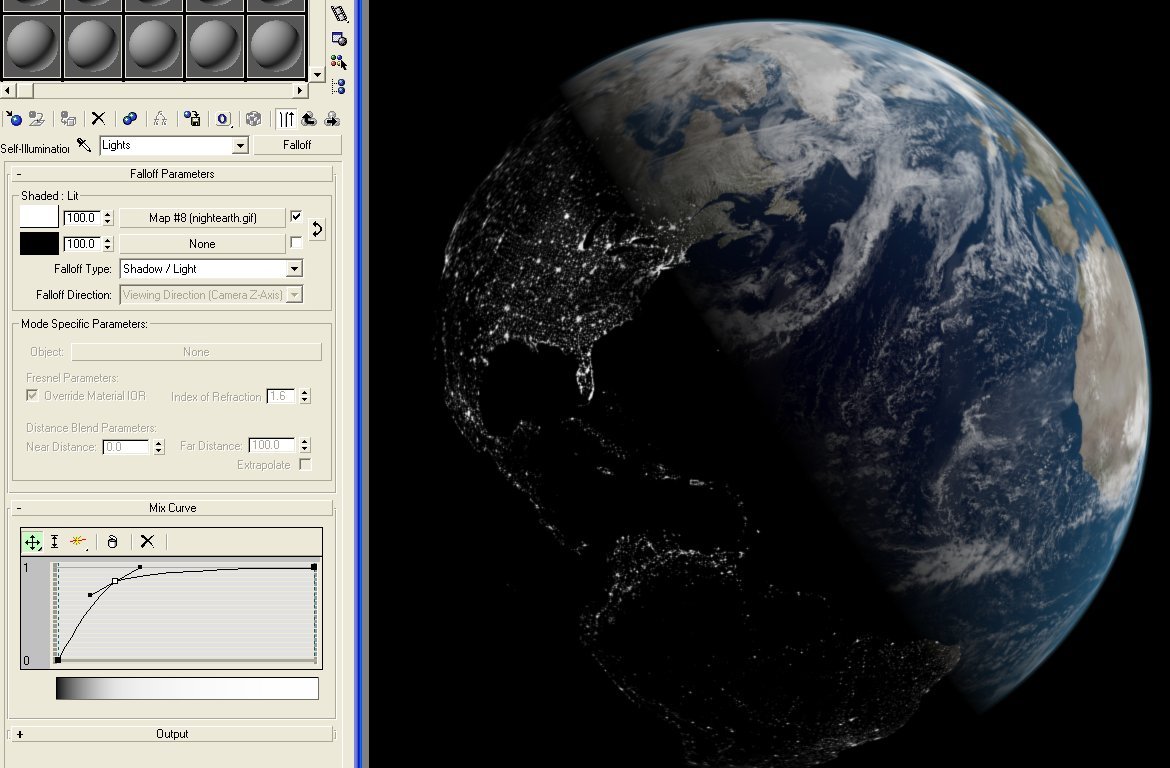
| Isn't it strange the way half of the glob is DARK… What you need is some street lights there (I know you couldn't see them due to the contrast but it looks good!). What you need now is a map of the earth at night… I get this map from the same site as most of the cloud map: http://visibleearth.nasa.gov/cgi-bin/viewrecord?5826. Make sure you get the "GIF" with nothing but lights as I think this looks better and the bigger the file you get the better the quality of any close-up shots will be (If you will want to do lots of far off shots maybe you should also get the smaller ones so you can change them to save rendering time when you don't need the big ones. Also I was unable to get MAX to load the biggest one.). Once you have got your light map create a falloff in the "Self-Illumination" slot of your earth surface and add the light map to the top slot then copy the options from the picture onto your fallout options. Finally tick the "Self-Illumination" box so that the box next to it changes to a large black block. If the box goes a different colour then click on it and change it to black. Re-render. |
|
|||
|
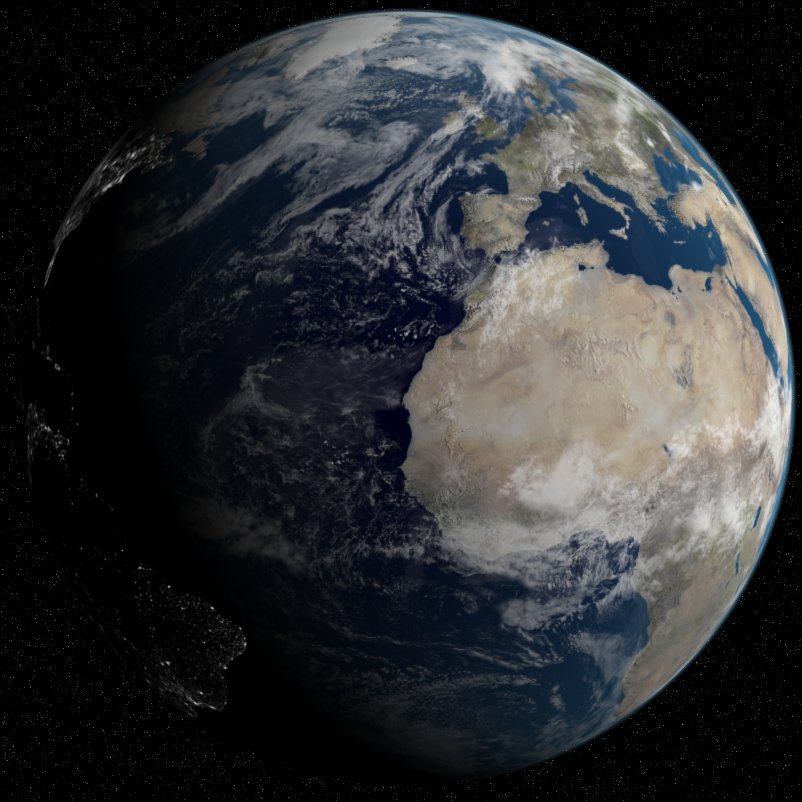
Now we need some stars in the background. As with the lights on the planet these wouldn't show up against the bright earth but they look good and are always a good thing to know how to create. As it seems impossible to turn a sample slots into a texture we will do it manually. First select an empty sample slot (Gray sphere for Max 4) and scroll down to the "Maps" section click on one of the empty maps ("None") and select "Noise". This will take you into the options for the new map of type "Noise" go back to the previous screen and drag and drop the new map of type "Noise" on top of the Sample slot we have used to create this is now a texture that we can use. Now change the "Size" to '0.3', the "Low" to '0.65' and rename it 'Stars'. That texture needs to be applied to the background of our scene. To do this go to "Rendering" on the top bar and then "Environment…" and drop "Stars" into the "Environment Map" slot and re-render... If you look closely at the black background you will see one or two stars. As usual if you mess around with the settings of the "Stars" texture you can change the amount of stars as well as the size and other options. | |||
| The only thing missing out of our scene now is… THE MOON! This one is easy. First create a sphere of radius: '1700'km (I can't remember the correct distance between the Earth and the Moon so if you want it correct I am sorry but you will have to look it up. The distance I used for this image is a LOT less that the correct one as it looked better to me: '37000'km) next drop a texture map of The Moon from the same site we have been using for most of the maps into the "Diffuse" slot and a bump map of The Moon into the "Bump" slot. I suggest you reduce the "Bump" down to about '20' from the default '30' to make it look a bit better. Now drop that onto our moon, adjust the view so that The Moon is just in the background and re-render… |

|
|||

|
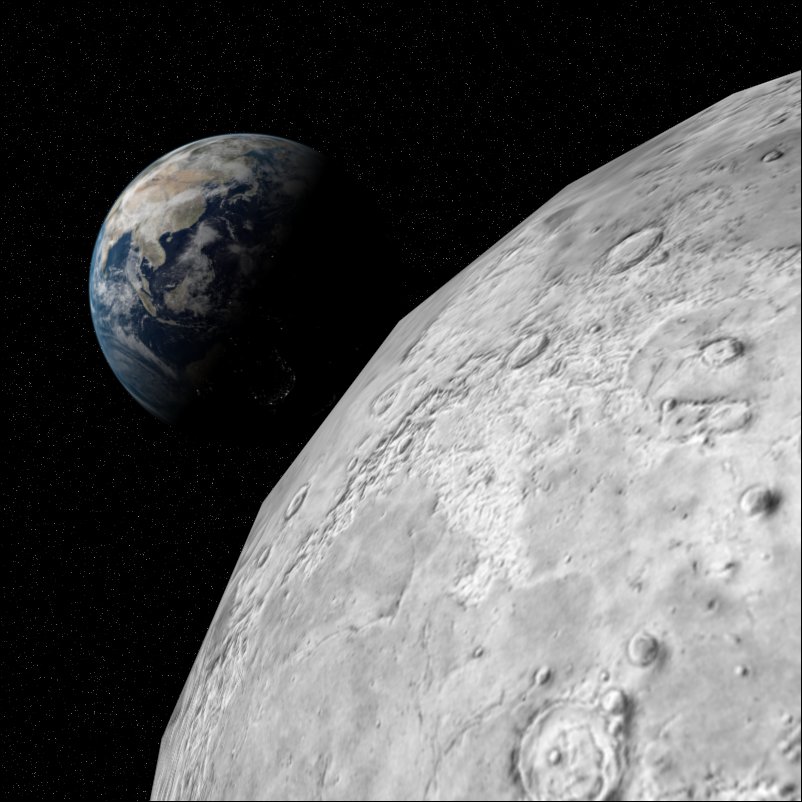
You can also get a nice shot from the moon to the earth by moving the camera / view like so… | |||
| If you are going to do a close-up of the moon like that last one make sure you increase the number of segments that the moon is made out of otherwise you end up with something like this. |
|
|||
|
|
||||
Last update: Year: 2008 Month: 01 Day: 05 Time:20:16 (UK Time)
All material copyrighted © by Zasurus www.thebzone.net unless otherwise specified.